What I know about Astroman… unsolicited beta
- Categories: Climbing
- Tags: astroman
- Comments(2)
- Previous Post
- Next Post
|
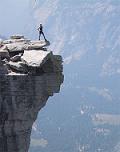
The reward after a special day, a day I finally set aside my fear, anxiety, and self doubt, and led every pitch (linked all in 8 pitches) of Astroman. At the summit, while I took in the mystic view of the valley created by the special effect of smoke (wish my camera had captured the tens of those fire fall streaks seemingly flowing down the vertical face of Half Dome), I couldn’t help but remembering the tragic losses from the fires that created the smoke. Beauty from ashes….
Oct 15, 2017 |

Disclaimer: Read on ONLY IF you are here to look for beta on this iconic Yosemite free climb Astroman, or just love to read anything related to climbing. If you feel that climbing beta (that means forums like Supertopo and Mountain Project, etc.) is completely unnecessary, please, please find yourself some more productive things to do. I offer what I know because I know many people crawl the Internet looking for any information they can get their hands on about the climb and I hope to provide some help. This is not to say that every reader will find it helpful, but I do my best.
That said, this is my blog post, which means I simply ramble whatever comes to my mind on or off the subject. So, it’s not too late for you to walk away right now…
…
Now, hey you, so you stayed. Well, I hope you are not too disappointed when I tell you I don’t claim to be an expert on this climb.
Many many people have climbed this route way more times than I have for way longer. There are those Valley locals who have easy access and run up it casually (I would if I lived closer as I assume anybody would). There are old-time climbers who climb it annually as a ritual for a decade or decades. I know one personally. But, they don’t write, do they? Otherwise, you’d be reading their beta instead of mine.
I, on the other hand, I’m neither. I’m a young-time climber. I wish I could claim to be still young, but that’s not what I meant. I did start climbing early 2003, and in year 2005, I climbed Astroman twice (had a wonderful ropegun who led what I didn’t), but then my climbing abruptly stopped end of 2005 when an old hunk TV jumped on my hand and broke a finger. I’m now a firm believer that TVs are bad for you. I got into doing other things or not doing anything… for 10 years. Then, the Dawn Wall saga brought forth by main stream media early 2015 reminded me of the beauty of those granite vertical walls and I started getting back out again in the fall of 2015. At the time of this writing, fall of 2017, I’d say, my climbing age is a youthful 4.
In my ~4 years of outdoor climbing, I’ve climbed up Astroman (to top that is) 7 times including the earliest two more than a decade ago, with the latest time as close as a few days ago, me leading every pitch (only botched redpoint entering Hardling Slot this time; otherwise, dare I say, in a solid style). So, I figured I’d write something down when memory is still fresh. Here goes, the non-definitive guide to Astroman.
Many people ask how to prepare for Astroman?
First of all, there is a definitive guide published by Supertopo called Road to Astroman. I think it’s a very good start. I’ll single out a few climbs.
1. The Rostrum.
In my own experience, I’d say, Astroman is probably 50% harder than the Rostrum, judging by a few factors:
– My fastest time on the Rostrum was a little over 5 hours and on AMan was 8.5 hours. Neither was rushed, but neither ascent saw unnecessary waste of time either.
– I am usually sore the days after AMan, and the Rostrum does not seem to have that effect.
– Climbing on the Rostrum is mostly straightforward, and protection is abundant and secure. On AMan, there is the technical 5.11 climbing on various pitches, and then there is the awkward or insecure 5.10 climbing throughout, which can easily take a toll on body and on mind. Usually, when I reach the base of Changing Corners (when I do the entire climb in 8 long pitches, this is the top of pitch 5), I feel that mentally, the climb is only a half way over.
– When you top out on the Rostrum, you can smell the food and drink in your car, but after topping out on AMan, you are faced with a descent that normally takes me 1.5 hours (just to get back to the base, which is still at least 30 minutes from car) even though I know the way pretty well now. My feet and ankles are not happy on and after that descent.
In summary, despite the “equal” rating, AMan is really a big step up from the Rostrum. So, how should one bridge that gap? Did you read that document called Road to Astroman?
2. Steck-Salathe.
I admit I did not do SS until 11 years after my earliest ascents on AMan. That said, I had the advantage of having a partner who knew my ability, knew the climb, had confidence in me, and not to mention was fully capable of getting both of us to top. If you are trying to figure it out for yourself, I say, do SS first. In my mind, the physical and mental toll SS exerts on a climber is close to that on AMan. The grueling descent will prepare you for AMan as well.
3. Generator Crack.
I’m not sure if this climb was mentioned in the document or not since I didn’t read it. But I’d recommend anyone aspiring to send AMan to first get some decent runs up Generator Crack. It’s so easy to set up, so really, there is no excuse. Granted, the bottom half of GC is a lot harder than any OW you encounter on AMan or the Rostrum (although it does prepare you well for the OW Pitch #6 on the Rostrum), what I want you to experience is get inside the crack on the top half (say, after that big jug) and try to wiggle your way up chimney style. Do you feel claustrophobic in there? I can say that the slot is a bit narrower than what GC generously offers. So, if you freak out inside GC, imagine worse in Harding Slot. I almost always led the Harding Slot pitch when I climbed with others, and I heard often, “I’m stuck! OMG, I’m stuck. No, I’m really stuck!!!” I usually tell them calmly, “you won’t fall out, so, slow down your breathing first… Now, have faith. Guys much bigger than you have made their way through this.” Needless to say, no climber has ever perished being stuck inside Harding Slot. The purpose of practicing on GC is to get efficient doing the squeeze chimney moves so you are not completely wasted after emerging from the slot.
4. Voyager.
This climb is relatively new — newer than the document. The Incinerator Pitch (a corner pitch) is not exactly Enduro Corner. However, it trains the mindset and climbing efficiency required in a sustained lieback corner. As a bonus, the tight hand start of Pitch 7 on Voyager is probably similar in size to a good portion on Enduro Corner pitch, which appears to be very difficult for some guys. Good training.
5. Astroboy? No
For the record, I do NOT recommend going for Astroboy as preparation for Astroman. I simply do not agree with that mentality. I will disclose there were a couple of ascents that I was involved in when we bailed for reasons out of my control, but it was never our goal of the day to just go and do part of the route. One time, we had only a 60m rope. To save my partner, quite wiped out, from potential disaster, I let him rappel safely on single rope, and then I dealt with down climbing the bottom portion of Enduro Corner due to the shortage of rope. We were committed to go to the top, but came up short. If you do not feel confident to do the whole thing, get solid else where first. Same thing goes for cutting in on the ledge to only do upper part of the Rostrum. If you really just show up to do part of the route, please please do everything you can to stay out of the way of through-climbers. It is simply not fair to rob them a good experience just because you are using the classic routes for low-commitment training.
Okay, now you feel ready, but you are one of those nerds who like to research to no end about everything, even reading reviews on the toilet paper you are about to order. Here is the offloading of my unsolicited beta. Again, I emphasize MY beta because you may very well find something else to work better for yourself. I’ve seen Mountain Project climbers claim “fall on Pitch n [of another route] due to bad beta.” No, beta is only to provide more options in case they did not come to you naturally. It’s up to you the climber to evaluate the situation and exercise the best judgement for yourself. Do not blame your failure on beta.
Gear List
4 quick draws
6 alpine slings all with two biners, shortened
1 half length sling with two biners (I call it my lucky draw).
One 70m rope . Allows linking first 3 pitches (per Supertopo) and bailing from the top of Harding Slot.
Set of nuts from #1 – #10 (I only placed one nut on last pitch, and I was not happy about the placement, but others may find more use for them throughout the route).
1 each black and blue alien
2 sets Green alien size to BD #3
single BD #4
Now, so far, I’ve always carried one extra BD #0.75 (green) and #1 (red) camelot, which make them triple, but I find that on no pitch I’ve needed all three, even including building the anchor. On Enduro Corner, I actually placed one each on my last ascent. Next time, for myself, I’ll only bring double as I feel pretty good running it out where I feel solid, and I feel solid in #1 size. That said, I suggest to anyone doing it the first time, bring triple.
No helmet for me on this one. (I’m not against helmet in general. Just did not find it very necessary for this climb.) Regardless of your own choice, make sure to take your helmet off before entering Harding Slot.
No tag line or a second rope. I have not picked up the practice of hauling a pack. If needed to, ask the follower to carry gear that’s not needed. Good training for the follower.
3L water (although my left arm cramped this time, and it didn’t last time when I brought 1.5L. Go figure. I mean, go figure it out for yourself.)
Bars and gels
A windbreaker shell. Sometimes, it can get breezy up high. The climb is mostly shaded due to the orientation of corners and flakes, but there is inevitable sun exposure here and there.
Pitch Breakdown
I’m laying out the pitches the way I do it, but will cross reference Supertopo so we are on the same page.
Pitch 1: Equivalent of Pitches 1+2+3 (5.10b variation) on Supertopo . A full 70m pitch without simul climbing.
I like this linkup when I’m leading in blocks these days because it speeds up the ascent, but more importantly, it allows me to decompress before leading Enduro Corner while bringing up the follower. It might not be the best idea for swing leads especially if the next leader needs a break before jumping on EC. [Edit: or, break up the pitches at top of p2, but link the short p3 with Enduro Corner, which a friend brilliantly suggested and I would definitely adopt next time!)
To do it the linkup style, you do everything you can to reduce rope drag, which is inevitable with the sheer amount of rope out sitting on the low angle slabs below (= friction). I learned my lesson dealing with a rope that I almost could not pull up, and this is what I do now:
The first piece I clip is the anchor at the top of ST p1. Then for the awkward 5.10 finger lieback above that anchor, I use long slings for my protection there despite my urge to clip direct into cams. Then I use a long sling to clip the anchor at the top of ST p2. After that, you can use a blue and a black alien right above the anchor to somewhat provide the next moves (I’ve used nuts for protection before as well). They are more mental pieces than practical protection because you know if you fall, with the rope out, you are going to land on the ledge anyway. If you are not confident about the moves, better to break up the pitch here, so the belayer can provide a close spot.
I used to place a BD #3 just when I mantle up to the belay ledge at the foot of Enduro Corner. Other than that, all the protection below are finger sizes up to BD #1.
Pitch 2: Enduro Corner (ST p4)
I think BD #1 to #0.75 are most useful in the 20 feet right off the belay ledge if they are bad size for you. After that, I find placements for a #3 and a #2 in some big slots inbetween the potentially pumpy thin crack segments. Other than that, its just finger sizes (up to Red Alien). I personally cannot see good full stems. Maybe it’s because my legs are short, but I always make good use of the periodic good edges on the left wall for rests in a half stem position. If you milk the rests, the enduro is really not all that enduro. The pitch is longer than what you can see from the belay ledge below, but once the enduro section is over, it’s just easy climb using features, cracks, and chimney to reach the next belay, where you are rewarded with a big ledge one can comfortably sit.
Pitch 3: ST pitches 5 and 6
Easy climbing to the anchor bolts on top of ST p5, where there is a great ledge to stand on. But I clip and continue. Above it is a hand crack in a deep grove. I always find  it very awkward to climb as a hand crack, but that may be because my arms are relatively short. I find it way more secure when I climb it chimney style (right side in). This grove will end and you need to transition into another flare an offset away. I’ve tried to do awkward chimney/OW climbing to stay in the flares while making the transition, but it didn’t work well. The best way (for me anyway) is to lie back on the flake, do a mantle to get above the bottom flare and then throw myself into the top flare chimney style. Before I make the committing moves, I place a #3 and a #4 for very safe protection. Climbing continues from there. Then you reach the hanging belay below Harding Slot.
Pitch 4: Harding Slot (ST p7)

Oh, the Harding Slot. I say that with a sigh. While the slot itself gives many guys nightmares, the real crux is to getting into the slot. There were times I led up through without much thought and felt easy, but then there were times (like my last time when I gloriously led bottom to top redpointing everything EXCEPT the entrance) it just felt so awkward and my inside foot kept on fighting for a purchase in the narrow crack (#0.75 size) with the rope in the way. But once I’m in, the fight is over. I wiggle my hips left up, right up, left up, right up, propelled by heel toes. I could go on in the slot – always shaded regardless of time of the day — forever, but it always goes by fast.
It almost never goes by fast for the male partners I led up that pitch recently. I’m sorry that small people have an advantage in here. Before you the reader venture up to it, I want to pound this belief into your head — guys bigger than you have wiggled their way through. So, be patient looking for the best path upward, and be calm in your breathing so you don’t expand your chest any further. Of course, the moment you enter and feel the squeeze, all the above advice will be thrown out of the slot. That’s just the way it goes. Still, you get through. I’m guessing the joy of finding out that you will not be stuck is pretty profound.
Oh, here is logistics how I do this pitch. I tie into the middle of the rope (Alpine knot). The side that leads to my belayer is the climbing end. I secure the other side to the side of my harness just to keep it out of the way and to prevent confusion. This is the hauling side. This is the only pitch I haul to make it easier on my follower. Once I reach the semi-hanging belay above the slot (the shortest pitch on the climb), I rig both strands (separated by the middle) for belaying and for hauling. My partner will clip everything securely to the haul rope (just wherever the rope ends up on that side with a long tail) and I start hauling. In the mean time, I also pull up the slack until “that’s me” from my partner and start belaying him (I normally carry two belay devices). If the partner is not confident about following the slot, it might not be a bad idea for him to keep ahold of the hauling side of the rope loosely just in case he needs to do some aiding shenanigans to gain ground.
Above the slot is when you and your partner should do some serious soul searching about whether you should continue on. If you do, you are committed. There is no safe and easy bailing above. Remember, I said earlier, for me, climb is only half way over (mentally) after the next pitch!
Pitch 5: ST p8
Another awkward connector pitch. Awkward moves right off the belay. After some more awkward climbing in a groove, you reach a small roof with two pitons. While there is supposedly a variation to go straight up, it’s never a debate for me as the natural path is obvious. I clip both pitons with long slings, traverse right at the roof, and high step up by way of the crack to the right while making sure my lead rope is not hung up in the corner. I don’t place gear here to reduce rope drag, but thin gear placement is available. A couple of moves later, I mantle/traverse left. The rest of climbing (another 30-40 feet) feels more like face climbing except for a very short section of finger lieback. Not hard, but mentally stimulating because gear is sparse by choice or by nature. Suddenly you pull up to a huge ledge that can sleep several. One good bolt and one old old hanger 4 feet to its right for the belay.
Pitch 6: Changing Corners. ST p9

For a long time, this was a pitch that I didn’t want to lead (besides the last). The crux for me was the boulder problem — marked by arrow — below the changing corners (where the climber is in the photo). When I just led it a week ago, it reminded me why I didn’t like to lead it. This problem is unique to me, or to short climbers. When you reach that horizontal crack below the bolt, you are already ~20 feet above and to the side of your belayer without protection in between. When you are short, you can’t see, let alone reach, the crack while standing (even tiptoe’ing) on the “ground” below. I had to make a couple of moves up, hold myself in a strenuous position and place gear blindly because I still could not see the crack. Not too much unlike this little guy here.
‘
(source)
I placed a red alien and, I think a blue Totem (a replacement to my lost green Alien), in two pods in that horizontal crack, equalized with a sling, all while holding myself up on the wall. It was tiring. Still, I had no confidence in my gear holding a fall when I actually made the moves before clipping the bolt because I knew the pods were flared. Fall is not allowed here.
That flake between the horizontal crack and the bolt where you see chalk is very sharp and thin, and may feel painful under the soft pads of your fingers. I grit my teeth, do a couple of lie back moves below and high step my left foot onto the ledge below the flake. I then gingerly bring my right foot in as well, stand up, switch hands on the flake, and clip with left hand. Unnerving because the protection I don’t trust is now at my feet, but I try not to let that feeling get to my head. After clipping the bolt, you can elect to reach down and remove your protection in the horizontal crack to save gear and to prevent rope drag like my partner did in the above picture. I didn’t bother, and rope drag was not an issue for me up high.
And in that photo where the climber is is where, after placing gear in the corner, you either traverse left onto the face or go straight up through the corner. The face climbing is delicate lieback edge climbing. Again, unnerving because your protection is around the arete and getting lower as you move up, but the moves are not too difficult (low 11’s). Before reaching the fixed cam piece right at the tip of the corner change, you can choose to peek around the arete, spot an opening in the crack, and place a #1 blindly to protect. Not a deal breaker if you don’t place it because two moves after that, you can clip the fixed cam.
I really enjoyed the very thin corner face climbing after that (for about 15-20 feet). I protect with black and blue aliens in those thin pods. Then you reach a parallel crack system. I climb the hand crack behind a thin flake to the left, but plug a #3 and then a #4 in the splitter wide crack in the wall to the right when I move up. When this splitter ends, do NOT continue up left in that hand crack even though a bolt can seen high up. A partner of mine made that mistake before. Instead, you traverse to the right and stay with the corner… until you can step right onto a ledge. This is a comfortable belay ledge to stand on, but you need some gear to build your anchor. I used a #2 placed high (#3 is more ideal, but I save both for the next pitch), two #0.75’s for the anchor here. Smaller gear can be used here too.
Pitch 7: ST p10 and p11.
Another connector pitch between the real deals. It’s not exactly a relaxing pitch because with my small hands and the wide crack through this pitch, I still have to work for it. Run out is necessary because the two #3’s and one #4 are pretty all that’s feasible on this pitch. You do run into two old thin hangers on protruding rivets. I sling both of them to equalize and which provides adequate protection. I save a #3 and a #4 for the top half of the climb. You can move the #3 ways and then protect the last bit with a #4 before you hit the bird poop covered roof cave. I traverse right with the hands in the secure horizontal crack and build an anchor (#1, #2, and #0.75) where it turns the corner.
When the second comes up, I ask him to continue walking on the big ledge all the way right to the corner, the start of the last pitch. He can use a #3 and #2’s to build a bomber belay there while I move myself over.
Pitch 8: ST 12
Oh, the last pitch!!!
I had never led it until last weekend. That’s how scared I was. The truth was I still didn’t want to lead it thinking that my partner would take it since he had already led it the previous time (plus Changing Corners as I led everything else). That was his first time on the route, and apparently he knew better now, so he made it clear that he would not want to do it again because “it was so dangerous.” It was now my call: if I wanted to do the climb, I’d have to lead it. It only took some hours of agonizing inner debate to decide to give it a go and while at it, just lead every single pitch of the climb. I’m thankful that I was put in that position. Sometimes, we all need a little nudge.
I know I’m not the only one nervous about that pitch. There was a discussion thread dedicated to it. And everybody I overhear talking about Astroman mentions that pitch with apprehension. It got the reputation! I’ll describe what worked for me, and this is written in 2017 as the beta may become obsolete in the future just like the 2005 beta (shown by a photo taken by me posted in that thread) is obsolete today. I will follow up on that thread just to clarify once I’m done writing here.
I place a #3 and a #4 to protect the easy climb above the belay ledge, which leads me onto a pedestal kind of ledge. This is the ledge everyone fears hitting. While standing here, you can reach up and clip a protruding angle. If you are short, you make a couple of small moves stemming to gain a foot or two, then you can place a nut in flared crack above the angle. I placed one, but I doubt it would have held because half of the rock was not in the crack. Oh well, I gingerly move up (again stemming) another foot more, that’s when I can finally reach up and clip a pretty solid looking fixed wire with a draw. I feel happy immediately after I clip. I’m safe for a few more feet.
With that protection, now I move up and left so I can place gear in the seam to the left. There are small slit pods. I place a blue alien and a yellow X4 (#0.2?) equalized. From here, in the old days (like, more than a decade ago), you could go straight up via very delicate (harder) climbing, but with some rusted fixed wire protection above. Today, in my mind, it’s not an option. The fixed wires are gone. The seam is filled with vegetation. Instead, I make a delicate step over to the right, two more easy moves lead me to the downward facing flake above my head — people call it a expanding flake. I hope it does not really expand, but apparently, gear did pop here for a climber on Mountain Project. If you can help it, don’t test it out!
I place a blue totem on the right of the tip and a red X4 (#0.1) to the left, again, equalized. That’s it, my last protection for a while. I have to commit. As my partner puts it — the moves are not hard, but you don’t want to fall. 15 more feet of “you don’t want to fall” face climbing lead you to the safety of a crack under a roof. Easy climbing over the roof (more cracks abundant) to a tree belay. The climb is over!
The climb is over!Â
The descent starts… It’s the least favorite part of mine about this whole climb, but I know as long as I don’t get distracted, keep my eyes open for the well-worn climbers’ trail, and make sure my footings are solid down the steep dirt slides or slippery slabs, I will be reunited with my pack at the base where more water is waiting for me. Oh, I do not leave any food with the pack (not even fully sealed bars) because the critters at the base are extremely able. That’s my last little piece of beta.
Thanks for reading this far. Will you let me know if you find this post helpful? Will you let me know if you made it to the top of the climb after all this time dreaming about it? I’d be very happy and honored to share your stoke. (Note: The comment section on Guestbook page remains open.)
|
|
||
Summit shot after my all lead ascent of the Astroman. (credit: James Huang)
- Post ID: 3034
- Categories: Climbing
- Tags: astroman
- Comments(2)
- Previous Post
- Next Post
Yo! Loved the write up on Astroman. Damn that mother flipper. Just wanted to reply to your MP comment with my own personal write up of our ascent this summer. We had a rather different experience lol. http://groovinslowly.blogspot.com/2017/09/astroman.html
Hi Owen, I was gripped reading about your ascent and glad that you guys pulled it off. What an epic, but then, epics make great stories. Thanks for sharing!